Showing posts with label reworked. Show all posts

Monday, August 30, 2010

Iron Away


So there was a major bummer with the awesome chandelier from this previous post… It was painted and looking all snazzy when dark clouds started to roll in. It really looked like a sudden down pour was on its way. So I moved it under the canopy and that’s when it happened…. The swing bumped up against it taking off a whole chunk of paint. I probably would have left it but it was a really noticeable spot. So I touched it up. Waited….. and then the bag it was drying on top of somehow got pushed up against it and tore off a BIG chunk of paint. Grrrrrr. I was not a happy camper. So there is currently no light fixture in that room and I now need to sand and repaint several spots. Bummer.


But on a happier DIY note, I have a fun project to show you. I recently decided that my ironing board cover needed an update from faded/stained stripes. There were no ready made covers that really matched the new colors in the laundry room, so I decided to make one myself.


Now before I jump into this mini tutorial please note:


~I am not a champion seam seamstress. Basic strait lines on a machine are a challenge for me. If you can sew for real – you may just want to look away. :)


Here is the yummy fabric I chose. Dark chocolate background, light and hot pinks, and creams. Isn’t it just lovely? I love it!


My ironing board is just over 2 ½ long, a little table top kind. Under the cover it had a thin but sturdy piece of foam and then just a piece of plywood. Fancy schmancy… oh, and it was from the Boutique. $3.99, yippee!


Here’s evidence of it’s tiny size - yep, that’s my kitchen counter. All full of junk… hmmm…..Guess I know what my next project is!


After ironing my fabric, I took the old cover and stretched it out flat on top of the fabric. Both were face down.

Then I cut out the basic shape of the cover leaving about 3 inches on every side.
The spray paint on my hands did not come off for several days!


Now here comes the not so technical part that I just made up as I want along. After folding the fabric within ¼ inch of the original cover I pinned it all the way around.

{Other side}

The ¼ inch became the pocket to feed the elastic through.


At the corners, I made sure to fold over one side flat and then the other on top of it.

That way when the pocket was sewn it would still be open to push the elastic through.


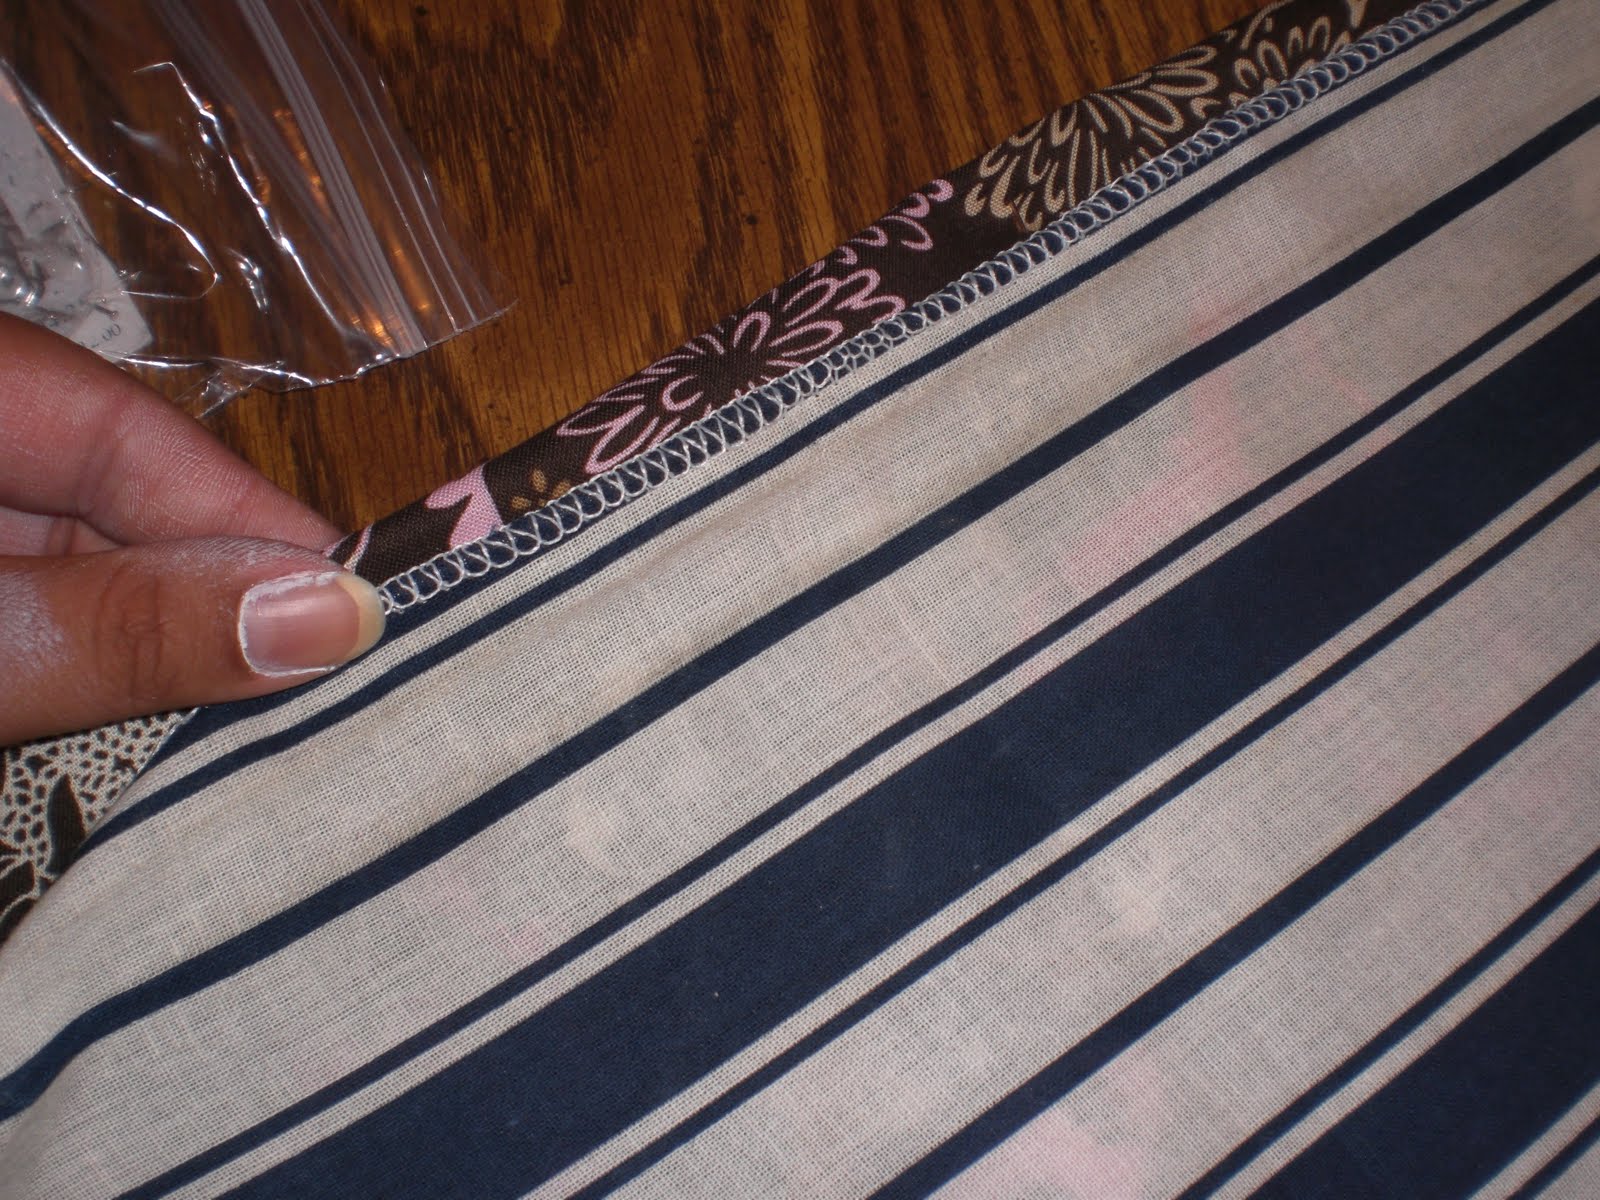
At this point I was ready to sew all the way around, making sure to leave a 1 inch gap at the bottom {short end}. That became the entrance and exit point for the elastic.


Once sewn, all I needed to do was attach a tiny safety pin to one end of the elastic and feed it through the little pocket all the way around. I did this, of course, while watching a previous episode of Design Star. hee hee!


All that was left was to trim the excess fabric and put it on. Tada!


By the way, there will be a laundry room reveal by the end of the week… I am just bursting at the seams, ready to show you! Stay tuned!


All photos taken by yours truly.

Wednesday, April 21, 2010

The Cover Up

As disappointed as I was to not be able to share this post with you yesterday, I had a very yummy reason for getting home to late to post. These:


Authentic Mexican Tamales.

A sweet friend taught me how to make them yesterday, and in exchange I taught her how to make my chicken salad. And then in between dishes we munched on the biggest strawberries I had ever seen! {Kicking myself for not taking a picture} It was the yummiest kitchen swap yet! By the way, don't ya just love this red plate? This would be so much fun to celebrate someone's birthday, accomplishments, anniversary, graduation, etc. It was a Boutique {Goodwill} purchase - $2.99, 30% off! Yippie for coupons!

OK, on to the post!


A little while ago I posted this photo of my most recent purchase: old baseballs. They had seen better days... which is why I am sure they ended up at the Fancy Store {aka: Goodwill Outlet.} Since our weekend trip when we stopped by a Christmas shop, I had several ideas for decorating foam covered balls rolling around in my head {haha... just re-read this. keeping the pun! ha!} The only problem is that those foam balls can be expensive!


So as I walked past the toy bins that day on my way to the housewares, it hit me. Why not use these baseballs in place of the expensive styrofoam balls from the crafts store? And since everything at the Fancy Store is by the pound, they wouldn't be more than $1-$2 right?
Wrong!
All three were 49 Cents!
Hello Awesomeness!

Before smoothing out the bumps...
After I gave them a good cleaning with disinfectant wipes, I decided to cover one in burlap {which I found out makes me sneeze like crazy! Note to self: craft with burlap outdoors.}

I honestly didn't think this one would work out well, so there are no step by step pics. But I was so wrong! I love it with all my little heart! All I did was cut a piece of burlap that would wrap around the middle, slightly overlapping and long enough to cover each exposed end.


After gluing the center ring, I cut tall triangles from the remaining fabric one at a time and then glued the tip of each down, again slightly overlapping. Does that make sense? You can kinda see the triangle shapes... but they blend real well once the whole ball is covered


I decided to finish this one off with a bit of chocolate brown satin ribbon. I love the contrast of the satin and burlap... and now that I see this pic close up, I need to pick some hot glue goobers off that bow!


Then my super crafty mom suggested that I cover one of then in a gingham/check fabric. I didn't have any one hand, but it sounded like a good excuse to take a trip to the fabric store and snoop around! :)

I thought about covering it the same way I did the burlap ball, but then thought it would be kinda fun to do strips of fabric and have the checks overlap eachother in a random pattern. It was a little messy to make, but probably the easiest.


I cut strips just over 1 inch wide that would wrap around the entire ball. It took 6 total. Then I mod podged one strip at a time, overlaping them slightly, and ending each strip on the same and. once each strip was smoothes out as best could be, I mod podged the whole thing with non glossy mod podge and let it dry. It is like a solid rock casing!

Inspiration from the Christmas shop!
For the last basball, I really wanted to replicate this christmas ornament that I had seen at a year round Christmas shop durring one of our vacations. After a bunch of trips to several craft stores, I could not find sparkly circles that did not cost an arm and a leg. I though about bagging the idea, then I remembered my small round scrapbooking punch. Could it really be that simple? I hit the scrapbook isle and picked out two sheets of a somewhat stiff chocolate brown. It wasn't quite as heavy as cardstock, and the stiffness helped make the little circles stand out.


I went home and punched circles till my little thumb thought it was going to fall off {Note to self: have big, strong, handsome hubby help punch circles for the larger size ball next time :) heehee!}


Then while looking at the inspiration photo, I hot glued one circle completely down - this was the bottom, center. NOTE: Every other circle after that first one was only glued on the top. That way the bottom stuck out giving it that fish scale, pine cone look.


Then I spaced each circle so that it just touched the next. For the next row, I left a tiny space between each circle. Not every row came out perfect, so to keep the funky seam on the same side, I drew little arrows so I could end on the same side every time.

Opps! That one needed replacing.

Some rows felt like they were all messed up, but then I would wrap around the next row and not even be able to tell where it went wrong on the previous row. It ended up being much more forgiving than I expected. And the best part? If a circle got in too low or too high, I just ripped it out and slipped in another. Easy Peasy!


It took about 45 min to 1 hour to puch, glue, rip off a few circles and talk on the phone for a bit. Totally worth every second of relaxing craft time and the beautiful result.


And yes I know it looks like a pine cone in brown. I was thinking about matching the rustic, neutral colors of the other balls... but my next baseball makeover will be a much more colorful one :)

Here they are in all their glory!

April 15th was a grand opening for a local Goodwill, and this lovely apothecary-like jar was $2.99, 50% off. Perfect for my repurposed baseballs!


The detail on the lid is just lovely!

For the next ones, I think I'll try ribbon, a sparkly "pine cone, " and sheet music.


What would you cover a baseball with?


All photos taken by yours truly.
Linking to Kimba's DIY, Today's Creative Blog, Blue Cricket DesignWFMW, and the Girl Creative. Join the Party!

Monday, January 25, 2010

Follow Up

As promised in my "Return to Blog-Land" post, I am making good on my New Years blog resolution and following up on projects in the works from last year's posts.


Remember this beauty? Yes, I know it was a long time ago. Reach deep into the memory bank... or click here for a quick refresher. It was a beat up old Welcome sign purchased at a garage sale. After removing the worn vinyl lettering, a light sanding and a few coats of 50 cent Oops-paint, it was ready for some freehand lettering and design.


All I did was download a free font that was swirly and unique, draw a light line to get the letters straight, and then freehand drew the letters lightly with a pencil. I then used paint markers to fill them in. One was regular size and the other was a fine tip. I just love paint markers. I have them in every color I can get my grubby paws on. But that will have to be a post for another day.


(don't know why this picture is so dark...)

The scrolly thing below didn't come out as even as I would have liked... but repainting and waiting to redraw it was just out of the question. Why? I wanted to use it right away. Simple as that. I was too excited to use it in my harvest tablescape. Maybe someday I'll get around to repainting it. But for now, it's imperfectly beautiful!

I'm linking this post up to Cottage Instincts "Make it for Monday," 
Be sure to head on over and check out these lovely blogs!

Photos from top to bottom: old welcome sign pre-transformation, the finished result, & the harvest display in our home from Fall 2009. (And yes that is a bunch of junk next to the table. Please avert your eyes. )


Thursday, May 21, 2009

The Best Is Yet To Come


What happens when a craft-loving housewife gets her hand on 5 sample cans of paint - all colors she loves or needs - for .50 EACH?


After doing a happy dance, she proceeds to paint everything in sight!


So stay tuned to find out what amazing projects these sample paints have been used on!

In the meantime, I'll leave you with this little tid-bit:

Next time you see this sign, it will be completely transformed!

Saturday, May 16, 2009

Garage Sale Finds

As promised, here are the wonderful garage sale finds from Saturday.


The credenza, everything in front and on the credenza (excluding the lamp) was either from garage sale or thrifted. Ahhh... what a day!


So come on in and take a look at the "new beauties" (and some "uglies" that will soon be "beauties").


I just love this frame and the possibilities that come with it! Should I put a mirror inside? A chalkboard? A print/painting? Or hang it just like that? Any other ideas?


A few weeks ago, I saw this post at
Sugar Pie Farmhouse about Chalk Ink Markers. Since then, I have been on the hunt for a chalk board. This little beautie was at Goodwill for $1.99. Just right! After a good cleaning and paint job on the frame, this little number will be gracing my walls. Be sure to check back and see how it turned out!

(by the way,
Sugar Pie Farmhouse has a fun Blue Ribbon Product Review Page. Check it out!)


OK. I think I have a serious problem. I love baskets and have them everywhere. Not just for looks - they are being used. Nevertheless, I probably didn't need any more. But this one was such a unique shape, big and priced just right at .25 that I couldn't pass it up. Look, I already put it to use holding the books we bought today for .25 apiece. That justifies it... right?


Two chair pillows for .50. Can't beat that! hmmmm... should I recover them? or leave as is?

This little number was free. And although it looks pretty bad now, the plan is to turn it into a beautiful Spring/Summer wreath. Keep those fingers crossed!
Stay tuned for the reworked chalkboard and wreath.
By the way, I'm adding this post to the Monday Treasures over at Southern Hospitality. Head on over and check out the fun finds!