Wednesday, April 25, 2012

Standing In The Gap

Read the first part of this journey here


Grief can feel loke a casm. An enless pit of darkness and threat of depression. A solitary place where all you have known and all you believe in are put into the harsh limelight of "why?"


Why us? Why now?


There were moments when I thought the grief could overtake me if I were not careful.


Those moments were scarry. They were lonely.


And while I never questioned my faith and His love for me, there were days when a part of me felt like it just could not go on.


My body was weak.
My heart faint.
It felt like there were no more tears to cry, and certainly no more energy to cry them... and yet they would return. Like a flood and overwhelm me again.


Yet these were the moments  - the ones that felt hopeless - when I realized that I was not alone. My husband and I were not grieving alone. We were not abandoned in our prayers for healing of my body and our hearts.


Because there were those who stood in the gap.


They were the friends and family who prayed when we were at a loss for words. The ones who praised God when our hearts wanted to, but our lips were still - frozen in grief. The ones who took the banner of faith and waived it strong when our we felt too tired to carry on.


Did we stop trusting God? Not for one minute. But we needed support, especially in the moments when both our bodies and our hearts felt too exhausted to go on.


How blessed we are to have such a support group. It made all the difference.


They stood in the gap for us when we needed it most.


Whose life could you impact with a prayer or word of encouragement?
Who could you stand in the gap for today?

Please note, this was written shortly after our loss. I am choosing to share this now as we approach the due date of what would have been our precious baby for two reasons: I want to remember. I want to remember how God brought us through and how faithful He still is. And secondly, because there are others who are hurting and need someone to reach out, support them... and stand in the gap for them. 

All photos taken by yours truly. 

Saturday, January 28, 2012

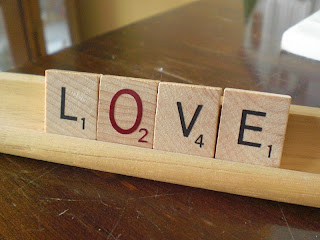
Updated Scrabble Tiles


Want to dress up your Scrabble tiles for the holidays? Last year my wonderful hubby gave me a Silhouette for Valentines day. 
~He knows the way into a DIY Wife's heart ~ 
I promptly decided on my first project, adding my own twist to scrabble tiles. {Want to make your own? Instructions below!}

Last year I started out by making this:

A pretty swirly heart and an oversize 2 - for hubby and me. get it? It's been up for a year and I love how it blends in with the tiles. 

Well this year I thought I would update it even more by adding a colored letter/number to the tile:

The Silhouette hadn't even finished cutting out the "O" and the 2 before I decided that it needed a little bit more, a single red heart:

I absolutely love having a touch of color to an otherwise neutral display.


And then the real revelation came... why not do a bunch of different shapes for the seasons or to use with different themed parties? 
EASTER/SPRING


EASTER:


SPRING/GARDEN


4th of JULY:


THANKSGIVING:


FALL/BACK TO SCHOOL:


CHRISTMAS:


Aren't these fun?
The possibilities are endless! I was really only limited by the color of vinyl on hand. 


Ready for the steps? {It's incredibly simple}
1. Design your shape with your favorite die cut program. Size your image to be just under 3/4 of an inch {the height of a tile.}
2. Cut out on vinyl scraps.
3. Using transfer paper apply to the back of a scrabble tile. Use the tiles that are least likely to be used like Z, V, X... you get the picture :)
4. Add it to your scrabble holder. That's it! How simple is that?


If you don't have a Silhouette or Cricut you can have small vinyl cutouts made at craft centers like Ben Franklin. Or simply use small stickers you love. 


Or if you are dying for your own set of Scrabble Die Cuts I am thinking about swapping advertising for the set of vinyl die cuts you see in the picture above. What do you think? Want to swap 8 die cuts {scrabble tiles not included} for a small space on your blog that links to too Blessed to Stress? If interested email me and we'll get this thing rolling. No blog is too big or too small!


By the way, you can find this and other too Blessed to Stress projects on my Pinterest board... along with other wonderful ideas I've pinned from other fabulous bloggers. Come follow and join in on the fun!

Follow Me on Pinterest


What little things have you done lately to update existing decor?

All photos taken by yours truly.
Silhouette is not compensating me in any way to mention their name.
Want to Party? Join me at these Linky Parties:


Funky Junk's Sat Nite Special


Tuesday, January 24, 2012

10 Minute Valentine


Sometimes it's the simple things that make the holiday decor just right. This is one of those projects. 


I originally saw this great idea in Country Living's December Issue, which featured this lovely couples farmhouse. Lovely inspiration photos on their site and they have the cutest twins!


So the idea was to take a dry erase marker and fancy up the photos on your wall for a party. That got my wheels turning... why not have a frame that you could change out photos and draw on throughout the seasons?

Dry Erase markers that have an eraser built into the cap.

I did have to make one purchase for this {which was against my "rules" set here. But here's what I have to say about that... rules-schmules! They were made to be broken right? And $1 for markers that you "need" isn't that bad... right?}


Ok so here is all that you need for this super fun, really easy valentine craft that will be usable throughout the year:
~ Frame with glass cover. Any size you want any color... just needs glass.
~ Photos Printed on regular copy paper-  No need to have fancy real photo paper that you pay an arm and a leg for to have someone blow up to size. Simply print it out on your color printer. Or use an existing photo. You can use one or more, all in a row or make a fun collage. Anything that floats your boat. 
~ Scrapbook Paper - for your background. Again: any color, size, pattern, etc. 
~ Painters Tape - {It has great release when you want to switch paper out} Or you can use any other taping/gluing medium. 
~ Dry Erase Markers

THAT'S IT!!!

Now you are ready to assemble.


Tape your scrapbook paper down with the painters tape to the backing of your frame. Mine took three 12x12 papers and it filled the space perfectly. I chose blue and chocolate colored paper since it matched the space is was going into, but you could use any holiday colors and even embellish with some large cutouts {hearts, stars, etc.} if wanted.


Then tape your photos on top of your colored paper. I chose a funny one of use trying to catch snow on our tongue, a sweet-kiss, and a cute one of us just smiling. 


Insert into frame and use dry erase markers to decorate on top of the glass with Valentine messages and funny drawings. 


I chose to leave the white border the printer left 
so that I could draw a "frame" 
with words and doodles around the picture. 


Isn't this just a hoot? I love this idea and it may be a permanent staple in our home. It only took 10 minutes to create and I get such a kick out of it every time I walk by it.


This would be great for a  birthday or holiday party, family get together, or to play a joke on your dinner guests. How about framing a photo of only your dinner guests {not anyone in the family} and hanging it in a prominent place of your home. Once they notice it have everyone "decorate" themselves and leave it up for a few days just for laughs. When you are ready for a change, erase and swap out the photo. 

What new craft ideas are you trying the Valentines day?

All photos taken by yours truly.
Want to party? Meet me here:


Monday, January 23, 2012

Paper Hearts


There is something so sweet about a garland of something. Anything cute seems to look cuter when there are a bunch of them in a row draping over your mantle.


Since I really don't need a single thing to decorate for valentines day but my little heart really wanted to add something, I issued myself this challenge: anything new is fine as long as it does not cost a cent.


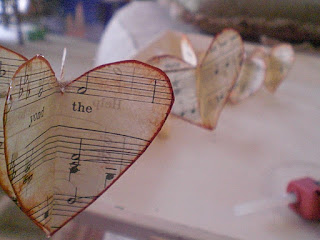
So I started off with my old stand by, copied sheet music. It all belonged to my Grandma and I love to copy it and use it when crafting. Not only does it satisfy my love of vintage sheet music it also holds a special memory of her, seeing as much of it has her handwriting in the margins. The end result was this cute paper heart garland.

Sweet, simple, rustic elegance.
Just what I needed.


Here's how to make it:

Start with three sheets of vintage sheet music or copies of a piece that you already own. I started off with three copies of a song titled "The Wedding Prayer." My Grandma played it at our wedding 8 years ago, and the title seemed fitting for Valentines day.


After folding in half and then in half again, you will be left with this chunky accordion fold.

{Ok so this was the best picture I could get one handed.
Sorry for the flash washout
and the temporary blindness it may have caused.}

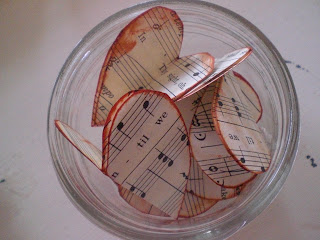
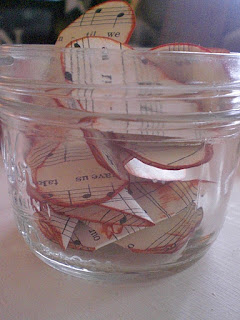
While still folded, free hand four hearts out of each folded piece of paper. That will make two identical hearts per cut.


 Keep each two together since you will be gluing them back to back later on.  


If you like, distress the edges with your favorite distress medium. I chose Rusty Hinge distress ink. {one of 5 different colors my mom gave me for Christmas. Let's just say my little DIY heart skipped a beat when I opened that box!}


Some people use a sponge to get the ink off but I just rub it right on the corners of the paper straight from the ink pad.


Easy Peasy.


Don't forget to open the heart up and distress the other side.


Next, take your glue gun and run a very thin bead of glue along the edge of a folded heart. {note: you could probably use a glue stick or other crafting glue as well if you don't want to work with hot glue in such a small quantity.}


Quickly match up the corresponding heart and press together.


Before the glue completely dries open it up and press your four fingers around the inside to form a sort of 3-d heart.


So pretty!


Once your hearts are all glued together, hold the heart open from below like so.


Take a piece of jute twine {or ribbon, string, etc.} and place a small dab of glue in the top of your opened heart and nestle the twine in that crevice.


It helped to tie the twine to the end of my tray to anchor it down while I glued the hearts.


Keep gluing till you run out of hearts.


Use as a garland or drape over twigs for a romantic-rustic effect. These little ones have lights, but any twigs from your yard would work just fine.

Stand back and admire.


They kind of remind me of Orange Lantern tree blossoms.


Have you started your Valentine decorating yet?


All photos taken by yours truly.

Want to party? Join these Valentine Linky Parties! I'll be there :)


Thirty Hand Made Days


momnivore's dilemma