Sunday, January 31, 2010

In The Quiet Place

"And may you have the power to understand, as all God's people should, how wide, how long, how high and how deep His love is."
~ Ephesians 3:18 NLT


As this verse says in the Message:
"Take in the extravagant dimensions of God's love."

Take a moment...
Show love to someone special.
Someone in need.
Someone who is overlooked.
Someone who needs to be loved.
Experience love today.

Saturday, January 30, 2010

Memory Board

Poor hubbster. He's sicker than sick with a nasty head cold and his whole body hurts. And today was supposed to be our first big day off together in a long time. Phoey.We had all sorts of plans that we needed to cancel last minute - but I have a feeling he might power through the yuckiness for one quick run to the goodwill :)

Quiet moments before the craziness of a day.

In order to let him sleep a bit longer today, I got up extra early (for a Saturday) and snuck out to the living room to craft for a bit. That way the sound of the shower won't rudely awaken him for a while longer. I know, I know... how sweet am I? {no need to mention that I really wanted to craft too} {{grin}}


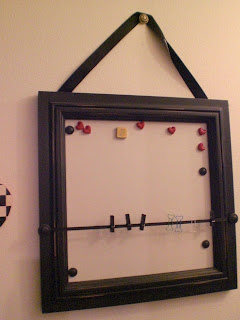
This morning seemed to be a great time to rearrange the magnetic memory board that hangs in the entryway. Since Valentines day is quickly approaching, what better theme than love and memories. I started with a blank slate. (yes, it looks like it's just a wall inside the frame, but there is actualy a  fabric board mounted behind the frame.)


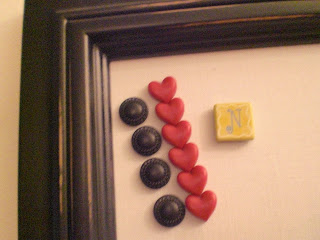
These were the cute magnets I had to work with. The "N" was from a gorgeous resort and spa in Washington. Every time I see it I am reminded of the wonderful time we spent there on the waterfront.


After rounding up all the fun photos and doo-dads to work with, I just began placing layers of scrapbook paper, photos, sayings, etc till I liked it.

The words "Memories, Love & Kisses" -
printed on plain printer paper and freehand cut into mini banners.


“If you live to be one-hundred years old,
I want to live to be one-hundred minus one day.
That way I never have to live a day without you.”
~ Winnie the Pooh


Metal quote from dollar store - pack of four words:
"Smile, Santa, Laugh, & Faith"


Tissue paper flower made for me by a sweet girl in my church.
Total cost of project - $0
Total Satisfaction - acheived!

And then after that I had a cookie - for breakfast. Yep, so far this Saturday is turning out to be pretty good.

Are you crafting some great way to display a memory? or are you and your family out making memories on another family adventure?
Feel free to share in the coments below -I'd love to know what fun plans you have up your sleeve for today!

Friday, January 29, 2010

Friday's Crafting Madness

It's Firday! And aside from the staggering amount of housework and cleanup from crafting last night that I must finish, there is nothing to do. Ok, so really there is plenty to do, but it can all wait until after this mornings fix of crafting and repurposing. So grab a cup of coffe, and join me on my adventures of not 1.... not 2... not 3 ........{{{{drum roll}}}........but 4 crafts this fine Friday morning.


Have you seen all the super cute bow holders made out of picture frames? Well I decided that it was time to make one to display all the fun bows I sell at open houses and boutique events. So for a week or so I have been on the hunt for a cheap frame. As in no more than a $1.00. Unfortunately the dollar store didn't have one large enough, and the regular Thrift stores we're either too expensive or way too big.


I was about to give in to the new, store bought one that was way more than I wanted/needed to spend.... and then I fount this beauty for 50 cents! Perfect.


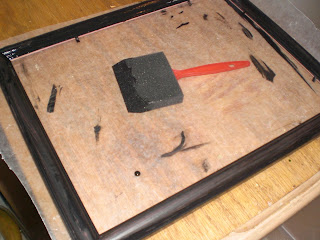
So after laying down a sheet of wax paper to protect the kitchen cutting board, I got to work lightly sanding and then painting the previously dusty pink frame a deep black. (There are times when I skip the sanding completely on wood projects, but this frame was too smooth and shinny.)


I used a foam brush in order to get into the small details of the frame. Remember: try not to go over and over the area that you've just painted. That way you'll have fewer brush marks and have to use less paint on the second coat.


After applying a light coat with even strokes, it was time to move onto other smaller projects while waiting for the first coat to dry. (Don't worry about the bald-ish spots. Round two of paint will take care of that)

The snowflake tablecloth is for crafting. I really have taken down my christmas decorations.
 {runs to take down one lonely reindeer} Really I have :)

Along with the frame, I also found this super-puffy-make-my-heart-happy rose lampshade. There was only one problem - one rose was missing. I decided on the spot that this unfortunate gap in the flower ring was actually a good thing. It could be filled with a bow or ribbon and then ta-da! two lampshades for the price of one.


So off the the ribbon bin in my craft closet I went and found this soft, sheer beauty. After playing around with the size a bit, I pinned it on, stood back to take a look, trimmed the tails and sealed them with a fire starter lighter.


Be careful, this ribbon shrinks the more direct heat it is exposed to. Be sure to leave the bow tails a little longer than you really want in the end so there is enough length to seal.


A dap of hot glue in the center back of the bow and we now have 2 lampshades in 1.

A touch of white.


All roses.


Oh yea. See that green spot at the base of the lamp?
That's what color it used to be before I painted it black.
It's usually hidden... but in an effort to be transparent make up for not noticing it when I took the photos, I'm pointing it out. No perfection necessary here!

{{Check in on frame... still not quite dry.... how about another project! }}


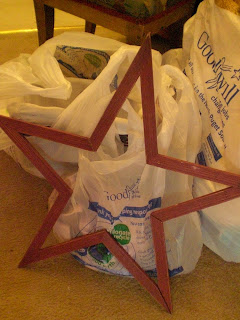
This wooden star was in great shape. And just 50 cents as well.


It's only flaw was a small chip on the backand the joints were technically "together" but not sealed well. Since the hot glue gun was fired up an ready, I turned the star over, pushed the seams as tight as I could, and "sealed" them with hot glue.


It worked great! Nice and sturdy. I'm sure this is how the experts at Home Depot recomend you do it.


Here it is in the entryway. With my discount "N" from the imperfections bin at Michaels. A coat of tan paint fixed that one up just right.

{{Frame ready on one side... other still a bit tacky... how about another project?}}


These felt beauties I worked on last night while looking after my poor sick hubbster. They are made out of all felt (green polka dots, red polka dots, white and black), and I just freehanded the letters and shapes till I got something I liked.


Then instead of sewing them all on, I glued them with this stuff. It worked really well.


Summer apple goodness.


Valentines message.


Juicy berry.


I was going to fill the berry pillow last night and hang the black panels, but it turns out the glue needs to dry for 24 hours. So come on back in to see the final reveal of these yummy felt projects.


Well the paint is dry and my tea cup needs filling, so come on back later today to see the final reveal of the bow frame.... and hopefully by then the house will be a bit cleaner too :)


Don't forget! As I mentioned in this post, I am planning my first ever giveaway. The prize and super simple guidelines will be revealed on Monday. I'll give you a hint: become a follower. It will increase your chances of winning. And tell you friends to come on over and follow too... the more people, the more times everyone's name will go in the drawing.

What amazing and fun crafts are you working on today? Feel free to share in the comments below. And as always, thanks for stopping by "too Blessed to Stress." Hope you'll be back soon!

This post is linked to Romodelaholic's Linky Party. Head on over for your Friday dose of remodeling goodness!

Thursday, January 28, 2010

Gotta Do What'cha Gotta Do

So today I had grandiose plans of posting two cute table setting for a coffe and tea time and linking to Tablescapes Thursday. But wouldn't you know, life got in the way yesterday and again today! What was it thinking? Work, slepping, geting home late and appointments keeping me from all of you on bloggie land - the nerve!


At first, I was super disappointed in myself for not getting it ready. Then I looked back over yesterday (when I usually get photos and thoughts gathered for a post) and today (when I out it all together) and realized that I was overly tired, had a genuinely busy day and at the end of it all.....
You Gotta Do What'cha Gotta Do!


And yesterday, I had to rest. Spend a few moments with hubby talking about our day before we drifted off into sweet dreams. I needed to eat a healthy meal.There were projects to finish. Today was worse! I'm just getting home and have not a single dish clean, nothing in the fridge for dinner, and the roof is caving in on me! (ok not really... that's all a bit more dramatic than it really is, but you get the picture right?)


So here is my conclusion after all this rambling:
1. It's ok to let something go and do it later. "too Blessed to Stress" is just that - not letting the stress of everyday affect our joy, love and hospitality as women, mothers, wives, daughters. It's learning to focus on the positive despite the junk thats going on around us.
2. I'm a week ahead on my tablescape posts! Next Thursday, be sure to stop by and see a charming and romantic setting for you and that secial someone (hubby, kiddo, neighbor, family, member friend) in your life.
3. I now have more time to post about the marvelous findings from the thrift store and my latest transformation project. It's a .... cuter than life footstool that needs some a LOT of TLC. And I can't wait till it's done to show you all!
4. And lastly, I can finalize all the details for my first giveaway ever!!!!!! yippie!!!! (yes, that's a lot of exclamation marks... but I'm so excited !!!!) I'll give you a hint: become a follower. It will increase your chances of winning. And tell you friends to come on over and follow too... the more people, the more times everyones name will go in the drawing.

What things are you having to say "no" to today so that you don't miss out on life's special moments now? Would you be willing to share in the commments below? As always, I love hearing from you all!

Photos from top to bottom: our sweet pup sleeping with her moose, valentines decoration in my home, sign I repurposed - check out the post here.

Wednesday, January 27, 2010

Fancy-Schmancy

Do you drool over those fancy-schmancy storage solutions for your craft items every time you are at the store? Do you secretly wish that you could have at least one of each cooler-than-life pencil cup, ribbon holder, drawer organizer, and table-top-tray-thingie that divides your little doo-dads into separate compartments?

Yeah, me too.


But let's get real. I don't have room in the budget for a matching set of Martha Stewart containers and boxes.


Small, cuter than life hat box keeps my fabric baggies ready for use and ready to take on the go with me.


This wide heart shaped basket is great when I need to sift through many items with only one hand.

I do, however, need to keep the crafting items neat, accessible, and contained in a practical way. My solution? Hit the Goodwill, or the "Boutique" as we fancy people like to call it.


This I use all the time to separate differnt elements of a project until I'm ready for them. It always sits right in front of me as I work.

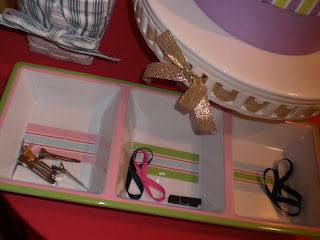
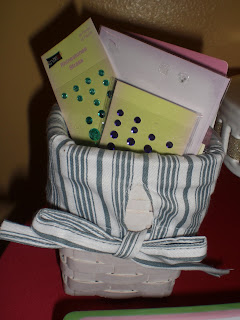
Take a look at all the cute containers, trays, and dividers I found. (And this isn't even all of them!)


Two deep dishes separate korker ribbon by size.


Isn't this little guy sweet? It holds all the sparkly embelishments for all kinds of projects.

Turns out, I actually like my solution better than the matchy set... and No, I am not just saying that to console myself. It is really quite rewarding to find simple solutions that are lovely at the same time.


The large, shallow shape of this iron basket is perfect for catching larger items that I need to grab while crafting.


These are great at a show or open house. Use them to separate people's orders while they shop, rest a hot glue gun on, keep sticky things away from the table cloth, etc. etc. I have several and use them all the time.


This beauty was origionally from Big Lots. It was brand new and still had the tag on it - $2.99. Not bad. But 20 cents at the thrift store is even better!

How do you keep the craft clutter at bay? Any tips or original ideas you could share?


Side Note: Yes, I know that the red valentines cloth does not match the pastel colors of my containers. But I was half way through taking the photos before I realized it, and am too tired to redo them. Either think of it as really super, fabulous, edgy color mixing.... or try to look past it. If I were you, I would go with option two.


This post is linked to Works for Me Wednesday. Head on over and see what other crafty ladies are doing!

Tuesday, January 26, 2010

Share the Love - Take 2


Seriousely... I have an illness.
It is called, Compulsive Crafting.


As with the Basket-a-holics support group (here), I need a Craft-addict circle too. Why? After saying earlier today that I didn't need to make any more Valentines decor, I decided to add a few more homemade hearts to the entryway.

This was the inspiration:

She has the best tutorial, so I will let you head over there and follow her direction. But I will show you how I altered the design a bit, since I didn't have a book I wanted to recycle.


It's ok... go on over...
I'll wait {{singing Jeopardy song quietly}}
You back? Ok here we go!

Like I said, I didn't want to recycle any of the books on hand, and I really didn't want to work with messy news paper. So I made my own strips of words to cut up and paste into hearts.


I chose to repeat the word Love (didn't see that one coming, did ya? :) in a diferent font every two lines.


After printing on plain old printer paper (I used only one sheet), I cut them into strips using my scrapbooking paper cutter.


If you don't have a paper cutter of any sort, freehand with scissors, or even use scalloped scissors to hide any imperfections in cutting.


I then sat on the living room floor with the pup to glue and press, glue and press till I had all these fun different hearts.


To get different sizes, I cut some strips in half, some into thrids, and left some whole.


Just eyeball it. No need for super accurate hearts.
Love comes in many shapes!


Since I didn't have a jar candle to fit inside another big jar, I shopped the house till I found this beauty -  a mason jar full of glittery strawberry ornaments. I took out four of the six berries, dropped in a few hearts, added a berry, more hearts, so on so forth till the jar was full.


Isn't it just so appropriate that "101 Love Songs" came on the Media Player as I was writing this post.... ahhh love, sweet love!


I am in love with the crisp white hearts, and sparkly berries in a farm fresh jar. Just the pick-me-up I needed for a Tuesday.


Are you crafting today? How are you adding more touches of love to your home? Please share in the coments below... I would love to see what inspiring ideas you have!


This post is linked to Today's Creative Blog. Take a minute and check out what other creative ladies are crafting today!