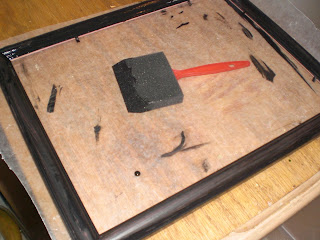
I was about to give in to the new, store bought one that was way more than I wanted/needed to spend.... and then I fount this beauty for 50 cents! Perfect.
So after laying down a sheet of wax paper to protect the kitchen cutting board, I got to work lightly sanding and then painting the previously dusty pink frame a deep black. (There are times when I skip the sanding completely on wood projects, but this frame was too smooth and shinny.)
After applying a light coat with even strokes, it was time to move onto other smaller projects while waiting for the first coat to dry. (Don't worry about the bald-ish spots. Round two of paint will take care of that)
The snowflake tablecloth is for crafting. I really have taken down my christmas decorations.
{runs to take down one lonely reindeer} Really I have :)
Along with the frame, I also found this super-puffy-make-my-heart-happy rose lampshade. There was only one problem - one rose was missing. I decided on the spot that this unfortunate gap in the flower ring was actually a good thing. It could be filled with a bow or ribbon and then ta-da! two lampshades for the price of one.
So off the the ribbon bin in my craft closet I went and found this soft, sheer beauty. After playing around with the size a bit, I pinned it on, stood back to take a look, trimmed the tails and sealed them with a fire starter lighter.
Be careful, this ribbon shrinks the more direct heat it is exposed to. Be sure to leave the bow tails a little longer than you really want in the end so there is enough length to seal.
A dap of hot glue in the center back of the bow and we now have 2 lampshades in 1.
A touch of white.
All roses.
Oh yea. See that green spot at the base of the lamp?
That's what color it used to be before I painted it black.
It's usually hidden... but in an effort to be transparent make up for not noticing it when I took the photos, I'm pointing it out. No perfection necessary here!
{{Check in on frame... still not quite dry.... how about another project! }}
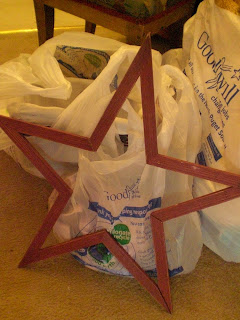
This wooden star was in great shape. And just 50 cents as well.
It's only flaw was a small chip on the backand the joints were technically "together" but not sealed well. Since the hot glue gun was fired up an ready, I turned the star over, pushed the seams as tight as I could, and "sealed" them with hot glue.
It worked great! Nice and sturdy. I'm sure this is how the experts at Home Depot recomend you do it.
Here it is in the entryway. With my discount "N" from the imperfections bin at Michaels. A coat of tan paint fixed that one up just right.
These felt beauties I worked on last night while looking after my poor sick hubbster. They are made out of all felt (green polka dots, red polka dots, white and black), and I just freehanded the letters and shapes till I got something I liked.
Then instead of sewing them all on, I glued them with this stuff. It worked really well.
Summer apple goodness.
Valentines message.
Juicy berry.
I was going to fill the berry pillow last night and hang the black panels, but it turns out the glue needs to dry for 24 hours. So come on back in to see the final reveal of these yummy felt projects.
Well the paint is dry and my tea cup needs filling, so come on back later today to see the final reveal of the bow frame.... and hopefully by then the house will be a bit cleaner too :)
What amazing and fun crafts are you working on today? Feel free to share in the comments below. And as always, thanks for stopping by "too Blessed to Stress." Hope you'll be back soon!
This post is linked to Romodelaholic's Linky Party. Head on over for your Friday dose of remodeling goodness!


fun craft projects!!
ReplyDeletethanks for sharing! :)
Thanks for stopping by my blog and leaving a comment!
ReplyDeletegreat projects! I became a follower so I can see what else you have up your sleeve!
gail
Wow! You are one crafty gal! Way to go! I love that star! And you displayed it so well, too : )
ReplyDeleteHoly cow! That was a very productive day! I love the star, that is a great buy!
ReplyDeleteCome back and show us the bow display at our next party!
Thanks for joining!
Thanks for stopping by my blog.
ReplyDeleteWhere in the world did you find polka dot felt? I'm in love and must buy some. Love your craftiness. :)