

I said it once {or twice... or more} fall is one of my favorite times of year. The colors, scents, tastes *sigh* just thinking about it makes me happy!

So as you can imagine it is one of my favorite seasons to decorate for as well. This year I thought that I would try out some neutral fall decor in the coca-cola room. Seeing as it is decorated in red, black, and white I needed something to stand out while not competing with the riot of colors in there.
Perfect chance to try out the black, white, and brown pumpkins I've been itching to make.

Small random interruption: OK, I just want to say something really quick. If you have not had time to decorate for thanksgiving/fall do not dismay. There is still time! If your little heart longs to see at least a bit of fall decor in your home go for it! It's never to late to make at least an entryway display, a simple centerpiece, or maybe a little touch on top of your mantle or bookcase. Keep it simple, no need to fret - autumn can still make an appearance in your home! Actually, these pumpkins are so ridiculously simple and inexpensive to make that these could be your touch of fall this year. Ok, I'm done. Getting of my soapbox :)

So as I was saying, I really wanted to try out a white pumpkin this year but the faux {and real ones} were just to pricey for me. I had an unspoken budget.... $1.00. Ok not really, but that is all I really wanted to pay for a single pumpkin. And lucky me, I found this one at the Dollar Tree.

After a 3 quick coats of plain old 99 cent glossy spray paint it was ready to decorate.

{By the way, always prop or hang the item you are spray painting. It will help you reach every corner and crevice on each coat. Here I am using a candle holder with a big stake in the center, covered with tissue paper. So easy!}

So all that was left was to decorate my happy white pumpkin. A bit of left over ribbon {which was from the dollar bin last year} covered the "seam" on the pumpkin and a little bow for cuteness. I was a tad bit worried that the glue gun would melt this foam-like pumpkin, but it worked great - score 1 more point for the glue gun!

How simple and CUTE is that?!?!

I loved it so much that I went back and got 3 more. So I guess this project cost me $4.00. A price I am willing to pay for a whole table top of decor!

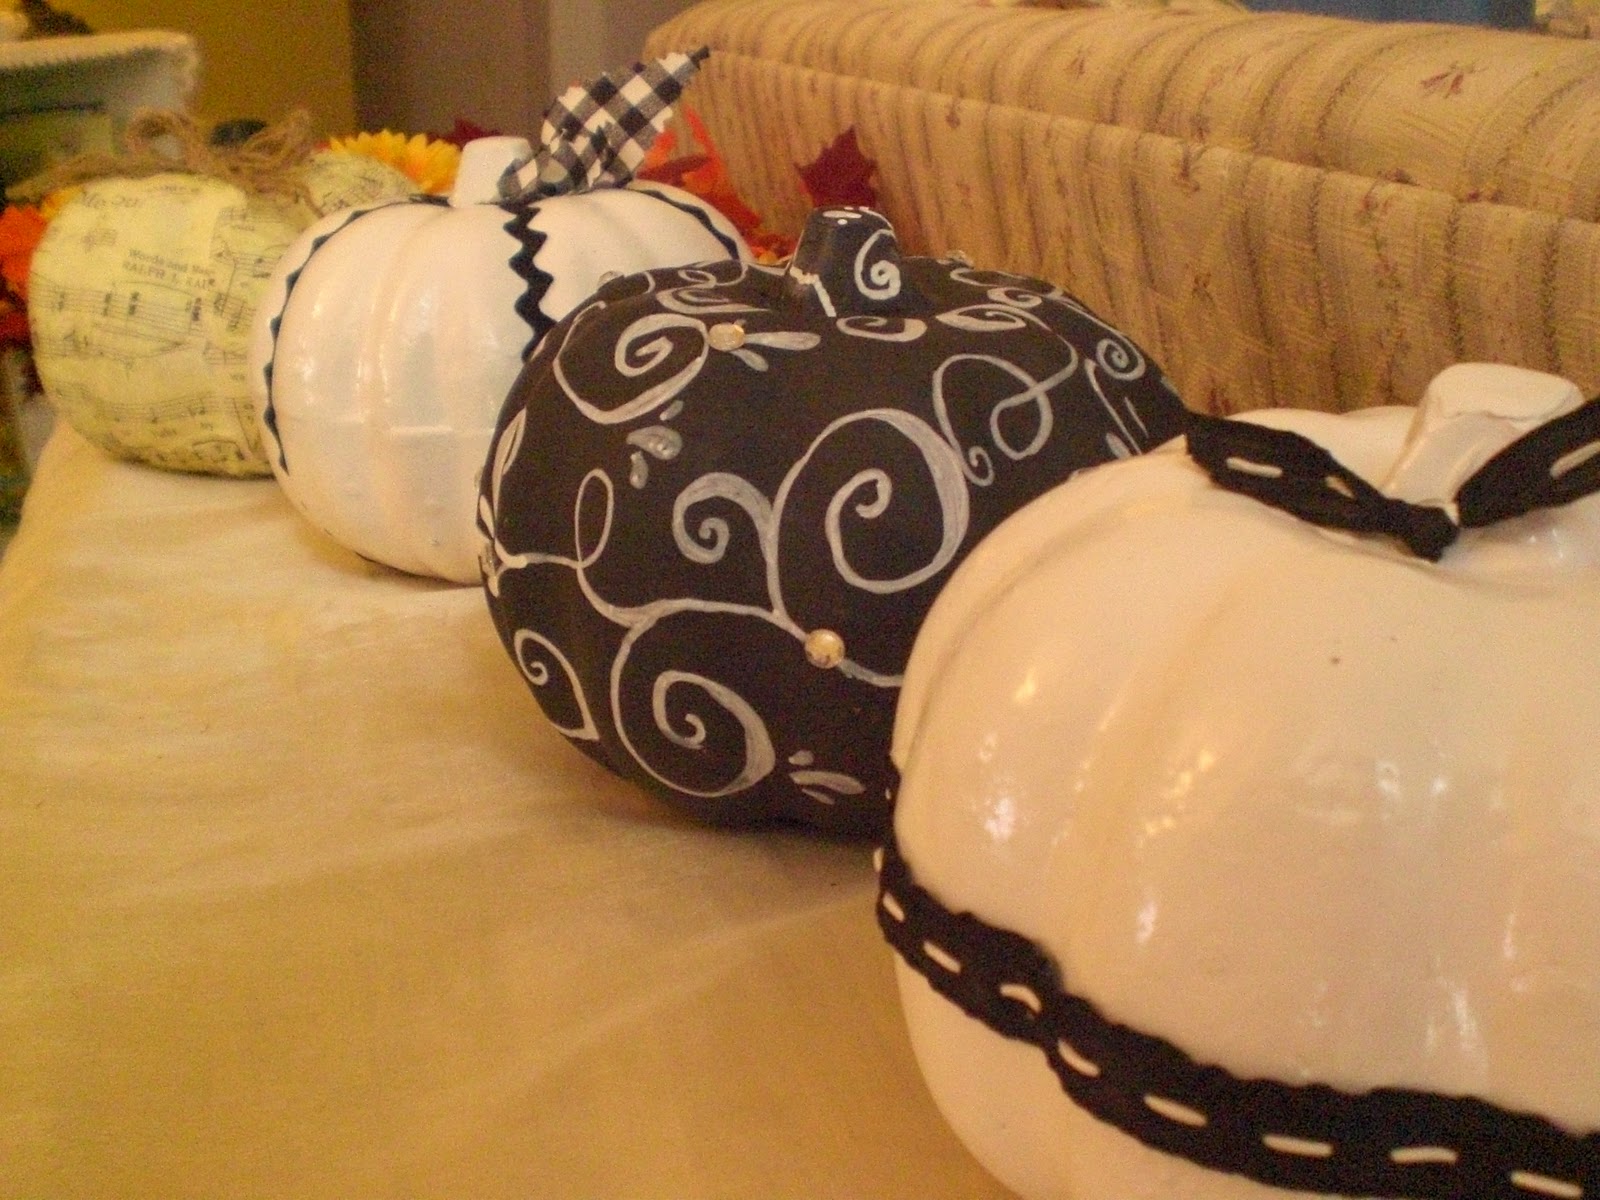
Pumpkin #2 got a coat of white as well, black ric-rak every 5 inches or so, and two little leaves made out of a scrap of black and white gingham fabric.

Both ribbon and fabric were attached with my trusty glue gun, of course.

Pumpkin #3 was coated in flat black cheap-o spray paint. Then I took a white Chalk Ink marker and free handed the squiggles all around and up the stem. A few rhinestones here and there applied with... you guessed it... the glue gun.. and done!!! Are you seeing a pattern here? Easy, Inexpensive, Satisfying. Oh yea, and glue gun.

The last pumpkin took a bit more time {like 10 minutes more, that's it!} I scanned and color copied some old sheet music that belonged to my darling grandmother. It already had some yellowing to it which copied as a great creamy brown. No photoshop adjustments or any fancy tricks. I just put it in the scanner, pressed color copy and printed it out onto regular old printer paper. How simple is that?

Then I tore it into random strips and chunks{no smaller than 2"x 2"} and mod podged them onto the pumpkin. As I placed each piece, I crumpled it up even more to give it some texture. I also made sure to press the paper really well into each vertical crevice on the pumpkin so that it would retain it's natural pumpkin shape.

After letting it dry, the stem got a coat of black acrylic paint - applied with my finger. I was to lazy to find a brush for only that. The finishing touch was some jute all twisted up in a bow and .... drum roll please... glue gunned on! Bet you didn't see that coming. Yes, my glue gun and I are inseparable.

There you have it! Four of the easiest pumpkins I have ever made... and they make my little heart happy every time I see them.

Have you decorated for fall? If not, are you planning on a few touches for thanksgiving?
All photos taken by yours truly and Mr. "too Blessed to Stress" aka, the hubby.
Love those!! Too bad we don't have Dollar Tree up here :(
ReplyDeleteAfter hearing about the Coca-Cola room, I'm suddenly craving a diet coke... haha ;)
Too cute!
ReplyDeleteWe've decorated for fall this year, my favorite time of year. Your p'kins are very cute, I really like the one you Mod Podged!
ReplyDeleteLOVE 'em! The music one is my favorite. SO cute!! Maybe I need to befriend a glue gun, lol.
ReplyDelete*smiles*
debbi
As much as fall is my second favorite season of the year, I'm not one for decorating for it. It's not that I don't want to, it's more like I just haven't! HA! Actually, I take that all back! I have one lonely little decoration out that has cute indians and pilgrims hanging in my entryway (which I STILL love saying!) that my MIL gave me about 5 years ago! But, I love the advice when you were on you "soapbox"! I'll probably just get the kiddos involved!
ReplyDeleteAlso, I hope you got to check out my post:
http://kitsch-a-licious.blogspot.com/2010/10/friends-are-best.html
It's about YOU you know! Have a wonderful evening!!!
Fall is my hands-down favorite season as well! Your pumpkins are wonderful; I especially love the sheet music one!
ReplyDeleteThanks for visiting Red Hen Home!
Super cute!! Not a fan of too much orange, so I love the white in my home, too!
ReplyDelete